
How to Calibrate a Digital Scale
2026-05-23
How to Calibrate a Digital Scale: A Step-by-Step Complete Guide
A digital scale is an essential tool for daily home use, kitchen baking, jewelry weighing, and even laboratory and industrial precision measurement. However, after long-term use, frequent movement, temperature changes, or battery replacement, digital scales are prone to inaccurate readings, drifting numbers, or minor measurement errors. Regular calibration is the key to ensuring consistent and precise weighing results.
Many people ignore scale calibration until they find obvious measurement deviations. In fact, calibrating a digital scale is a simple, fast operation that does not require professional tools. This guide will walk you through the entire calibration process, including pre-calibration preparation, detailed step-by-step operations, post-calibration testing, and solutions to common calibration problems, suitable for almost all portable and desktop digital scales.

Why You Need to Calibrate Your Digital Scale Regularly
Before learning the calibration method, it is necessary to understand the importance of calibration and the scenarios that require immediate calibration. Digital scales rely on internal strain gauge sensors to calculate weight. External factors will affect sensor sensitivity and lead to inaccurate data.
First, frequent movement and vibration are the most common causes of errors. Moving the scale from one countertop to another or accidental collision will shift the internal sensor position. Second, battery issues affect measurement stability. Low battery power often leads to floating readings and inaccurate weighing. Third, temperature and humidity changes will interfere with sensor operation; extreme cold or hot environments will cause data deviation.
In addition, if your scale has not been used for more than one month, or you find that the weighing result is obviously different from the standard weight, you must perform a full calibration. Regular calibration can not only ensure accurate data but also effectively extend the service life of the digital scale.
Pre-Calibration Preparation: Ensure Accurate Calibration Results
Incomplete preparation is the main reason for failed calibration. Before starting the formal calibration steps, complete the following preparations to eliminate external interference and lay a foundation for precise calibration.
1. Prepare Standard Calibration Weights
Standard calibration weights are the core of scale calibration. Do not use random items such as water cups or mobile phones for calibration, as their weight is not accurate enough. It is recommended to use precision calibration weights that match the scale’s range. For household kitchen scales, 100g, 200g or 500g standard weights are sufficient; for high-precision jewelry or laboratory scales, choose professional gram weights with error less than 0.01g.
2. Choose a Suitable Working Environment
Place the scale on a flat, horizontal, hard and stable surface. Soft surfaces such as wooden tables with gaps, carpets and sponges will absorb pressure and cause calibration errors. At the same time, avoid environments with strong wind, direct sunlight and severe temperature changes, and keep the indoor temperature at 20-25°C, the most suitable temperature for scale operation.
3. Clean and Inspect the Scale
Wipe the scale surface and weighing pan with a dry clean cloth to remove dust, food residues, water stains and other sundries, to avoid the weight of sundries affecting the calibration baseline. Check whether the scale feet are completely grounded and whether the weighing pan is loose or stuck. If there is debris under the pan, clean it up in time.
4. Guarantee Sufficient Power
Check the scale battery level. Low battery will cause unstable system operation and calibration failure. It is best to replace with a new battery or fully charge the rechargeable scale before calibration to ensure continuous and stable power supply during the process.

Step-by-Step Guide to Calibrate a Digital Scale
Most digital scales on the market adopt a unified calibration logic. The following universal steps are applicable to household kitchen scales, portable mini scales, precision jewelry scales and other mainstream models. For individual brand-specific operations, you can refer to the product manual on the basis of these steps.
Step 1: Preheat the Scale
Turn on the digital scale and let it stand for 30 seconds to 2 minutes (depending on the scale precision). High-precision scales need a longer preheating time. Preheating can activate the internal sensor and make the system enter a stable working state, avoiding calibration deviation caused by cold start of the machine. After preheating, confirm that the scale screen displays zero normally without floating numbers.
Step 2: Enter the Calibration Mode
This is the key step of calibration. Most digital scales enter the calibration mode through key combination operations. The most common method is: press and hold the "ZERO" or "TARE" key for 3-5 seconds until the screen displays calibration symbols such as "CAL", "CAL 0" or a flashing number.
A few models need to press the power key and the tare key at the same time to enter calibration mode. If the screen does not respond after pressing for a long time, refer to the product manual for the specific key operation. Do not press keys repeatedly in a short time to avoid system confusion.
Step 3: Complete Zero Point Calibration
After entering the calibration mode, the scale will first perform zero point calibration automatically. At this time, do not place any items on the weighing pan, keep the pan empty and stable. Wait for the screen to stop flashing and display "0.00g" or "CAL 0 OK", which means the zero point calibration is completed. The zero point is the baseline of all weighing data, so this step must be accurate without any external pressure interference.
Step 4: Load Standard Weight for Precision Calibration
After the zero point is calibrated, the screen will flash and display a fixed standard weight value (such as 100g, 500g, 1000g). At this time, gently place the matched standard calibration weight in the center of the weighing pan. Do not place it on the edge, otherwise the stress will be uneven and cause errors.
Keep the scale and weight stable, wait for 3-5 seconds, and the scale will automatically identify and calibrate. When the screen displays "OK", "PASS" or the fixed weight value stops flashing, it means the weight calibration is successful.
Step 5: Exit Calibration Mode and Reset
After the calibration is completed, remove the standard weight, and the scale will automatically return to the normal weighing mode. If the scale does not exit automatically, press the power key or tare key to exit manually. Wait for the screen to return to zero again, and the whole calibration process is officially completed.
Post-Calibration Test: Verify Calibration Effect
After calibration, do not use the scale directly. It is necessary to conduct a weighing test to confirm that the calibration is effective. You can use standard weights of different specifications for multiple tests: place 100g, 200g, 500g weights respectively, and check whether the screen display value is consistent with the standard weight.
If the error is within the scale’s allowable range (household scale error ≤0.1g, high-precision scale error ≤0.01g), the calibration is successful. If the data is still inaccurate, you need to re-calibrate after checking the environment and scale status. It is recommended to test 2-3 times continuously to ensure stable and consistent data.
Common Calibration Problems and Solutions
Many users will encounter problems such as calibration failure, screen error prompt and unstable data during operation. The following are common faults and targeted solutions to help you solve calibration difficulties quickly.
1. Cannot Enter Calibration Mode
The main reasons are insufficient power or wrong key operation. Solution: Replace the battery first to ensure sufficient power; confirm the calibration key method according to the scale manual, and press and hold the key stably for 3-5 seconds instead of short pressing.
2. Calibration Failure with Error Code Display
It is usually caused by unstable placement, residual sundries on the weighing pan, or incorrect weight specification. Solution: Re-clean the weighing pan, adjust the scale to a fully horizontal state, and use the standard weight matching the screen prompt value for calibration again.
3. Calibrated Data Still Inaccurate
Long-term wear and internal sensor aging may cause this problem. Solution: Re-calibrate after replacing the battery; if multiple calibrations are invalid, it means the scale sensor is damaged, and professional maintenance or replacement is needed.
4. Screen Numbers Float Randomly After Calibration
It is mostly affected by external wind, vibration or temperature. Solution: Move the scale to a closed, stable and constant temperature environment, clean the sundries under the weighing pan, and restart the scale for secondary calibration.

Daily Maintenance Tips to Keep Scale Accurate
Good daily maintenance can reduce calibration frequency and keep the digital scale accurate for a long time. First, avoid frequent movement and violent collision of the scale, and fix a stable placement position for long-term use. Second, clean the scale in time after each use to avoid corrosive substances such as oil stains and sugar water from damaging the sensor.
Third, do not overload the scale for weighing. Overload will cause permanent damage to the internal sensor and lead to irreversible errors. Fourth, take out the battery if the scale is not used for a long time, to avoid battery leakage corroding the circuit board. It is recommended to calibrate household digital scales once every 1-2 months, and high-precision scales once every two weeks.
Final Thoughts
Calibrating a digital scale is a simple but essential daily operation. A lot of weighing errors in life are not caused by scale damage, but by long-term lack of calibration. Mastering the standard calibration steps, doing a good job in pre-calibration preparation and post-calibration testing, and matching with scientific daily maintenance, can always keep your digital scale in the best working state, ensuring accurate data for baking, experiment, commodity weighing and other scenarios.
Why Do Mosquitoes Love Summer So Much
Large-Area Mosquito Control Solution for Shops and Restaurants
Related Article

Throughout 2023 and most of 2024, solar outdoor mosquito killer lamps remained a niche, secondary product category. On Amazon, these items were mostly categorized as patio decor with basic mosquito-killing functionality. Each individual ASIN only generated 8,000–15,000 units in annual sales, failing to gain traction as mainstream outdoor and garden merchandise.
Solar Outdoor Mosquito Killer Lamps Wholesale Buyer Guide

Most importers treat an OEM mosquito swatter order as a single transaction: send a sketch, get a sample, place a PO. In practice, every project that ships late in the first 18 months of a brand breaks down for the same five reasons — undefined artwork handoff, tool-making left until after PO confirmation, certification testing ordered in parallel with sampling, and packaging dielines frozen too late.
OEM Swatter Manufacturing Project Management
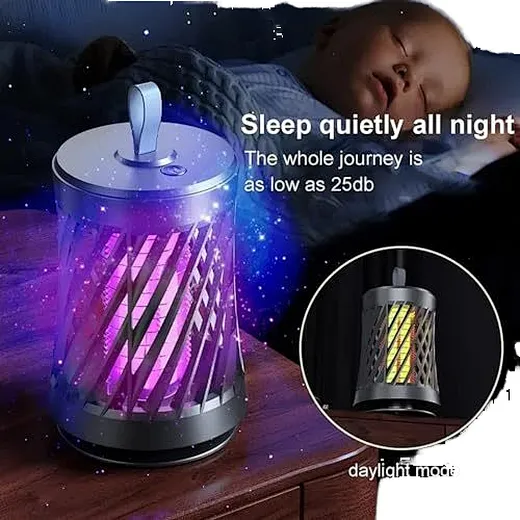
The charging port is no longer a minor accessory detail for mosquito swatters and UV mosquito killer lamps in 2026. It has become a core indicator that determines product price tiers, EU market eligibility, after-sales failure rates, and global buyer preference. For exporters, distributors, and retail buyers, choosing between Type-C and Micro-USB directly impacts profitability, compliance risks, and market competitiveness.
Type-C vs Micro-USB on Mosquito Swatters and Killer Lamps

Mosquitoes are more than just annoying summer pests—they carry harmful pathogens that cause Zika, dengue, West Nile virus, and other serious illnesses. While store-bought sprays, repellents, and DIY traps offer temporary relief, they fail to address mosquito infestations at the source.
What Do Pest Control Companies Use for Mosquitoes