
How to Installing a Sticky Insect Trap Light
2025-09-04
A Step-by-Step Guide to Installing a Sticky Insect Trap Light: Say Goodbye to Pest Troubles Easily
In restaurants, warehouses, and home kitchens, pest issues are often frustrating. Sticky insect trap lights are a top choice for their safety, no chemical pollution, and effective pest control. However, incorrect installation reduces their efficiency. This guide breaks down installation from preparation to maintenance, helping you eliminate pests.

I. Before Installation: 3 Key Preparations
Spend 5 minutes preparing to avoid rework and ensure smooth installation.
- Choose the Right Location
Sticky traps attract pests via phototaxis, so location matters: Install near pest-prone areas (e.g., under kitchen sinks, warehouse cargo corners, restaurant prep zones). Keep it ≥1.5 meters from food storage to prevent contamination. Avoid direct strong light (e.g., windows) as it weakens attraction. For homes/small spaces, install 1.8-2.2 meters high on walls; for commercial areas (restaurants/warehouses), 2.2-2.5 meters—this covers more ground and eases sticky board replacement.
- Check Accessories
Unpack and verify: Main unit, mounting bracket/ceiling plate, expansion screws + self-tapping screws (2-4 each, brand-dependent), 1-2 spare sticky boards, and instruction manual. Wall-mounted setups need brackets/screws; ceiling-mounted may need extra clips (some brands include them). Replace missing parts—never use mismatched screws (risk of instability).
- Prepare Tools
Basic tools suffice: Electric drill (6mm bit for wall holes), Phillips/flat-head screwdriver (match screw type), optional level (for even installation), and pencil (mark holes). Wood walls: Skip the drill (use a screwdriver). Brick/concrete walls: Must drill—otherwise, screws break or walls crack.

II. Core Installation: 3 Scenarios for Beginners
Sticky traps install via wall-mounted, ceiling-mounted, or hanging methods—choose based on your space.
Scenario 1: Wall-Mounted (Flat Walls: Kitchens, Warehouse Columns)
- Mark Holes: Attach the bracket to the wall, level it, and mark screw holes (2-3 total).
- Fix the Bracket: Drill 3-5cm deep holes (match screw length). Insert expansion tubes (skip for wood). Screw the bracket tight—avoid over-tightening (prevents deformation/cracking).
- Install the Main Unit: Align the unit with the bracket’s slot; push/snap into place (some twist clockwise). Shake gently to confirm stability.
- Add the Sticky Board: Open the unit’s cover, peel the board’s film, insert it into the 卡槽,and close the cover tightly.
Scenario 2: Ceiling-Mounted (Flat, Unobstructed Ceilings: Restaurants, Living Rooms)
- Mark Holes: Stand on a stable ladder, attach the ceiling plate, level it, and mark 2-4 screw holes.
- Fix the Plate: Drill holes, insert expansion tubes, and screw the plate to the ceiling. Note the plate’s direction (check manual—some have front/back).
- Connect the Unit: Align the unit’s hook/buckle with the plate; snap/rotate to fix. For wired models, thread the cord through the plate first. Check if the unit is level.
Scenario 3: Hanging (No Walls/Inconvenient Ceiling Drilling: Warehouse Centers, Large Kitchens)
- Fix Hanging Parts: Attach a ≥2kg load-bearing hook/ring to the ceiling’s beams/keels. Tighten screws (unit weighs 0.5-1kg—reserve margin).
- Attach Rope/Chain: Tie one end of the merchant-provided rope/chain to the hook, the other to the unit’s hanging hole. Adjust length to 1.8-2.5 meters; clip to prevent shaking.
- Install the Sticky Board: Follow wall-mounted steps (open cover, insert board, close tightly).

III. After Installation: 2 Precautions + 1 Maintenance Tip
Proper post-install care ensures long-term effectiveness.
- Check Before Powering On
Do not plug in immediately: Verify the unit is stable, the sticky board is correctly installed, and the cord/plug is undamaged. Use a switch socket (eases maintenance). Power on—check for soft purple light (normal). If it fails: Tighten the plug, check the internal fuse (replace with the same model if blown).
- Avoid Interference
Keep other lights (lamps/spotlights) away (disrupts phototaxis). Clear debris around the unit (ensures even light). In food spaces, avoid air vents (wind blows pests away).
- Regular Maintenance
Sticky boards last 1-2 months (replace early if full). To replace: Power off, open the cover, remove the old board (avoid glue), and insert a new one. Wipe dust monthly (prevents dimness). Check cords/plugs yearly—replace aging/loose parts.
IV. FAQs: Avoid Common Mistakes
- Q: Poor trapping effect?
A: Possible issues: Wrong location (too close to food/light/vents), unpeeled board film, or weak light. Adjust location, replace the board, and check the bulb (contact the merchant for replacements).
- Q: Kids/pets at home—what to note?
A: Install ≥2 meters high. Choose odorless, non-shedding sticky boards (prevents ingestion). Keep kids from touching the unit (slight heat is normal, but avoid burns).
- Q: Can it be used outdoors?
A: No—ordinary models are damaged by rain/dust; outdoor light reduces efficiency. Use a waterproof outdoor model and add a canopy (prevents rain entry).
Installing a sticky insect trap light is simple—beginners finish in 30 minutes. Correct installation cuts pests and avoids chemical harm. For special issues (odd walls/mismatched parts), contact brand support. Try it today for a pest-free space!
Electric Mosquito Swatters is Low-Cost Eco-Friendly Living
4 Core Advantages of 18650 Lithium-Ion Batteries
Related Article
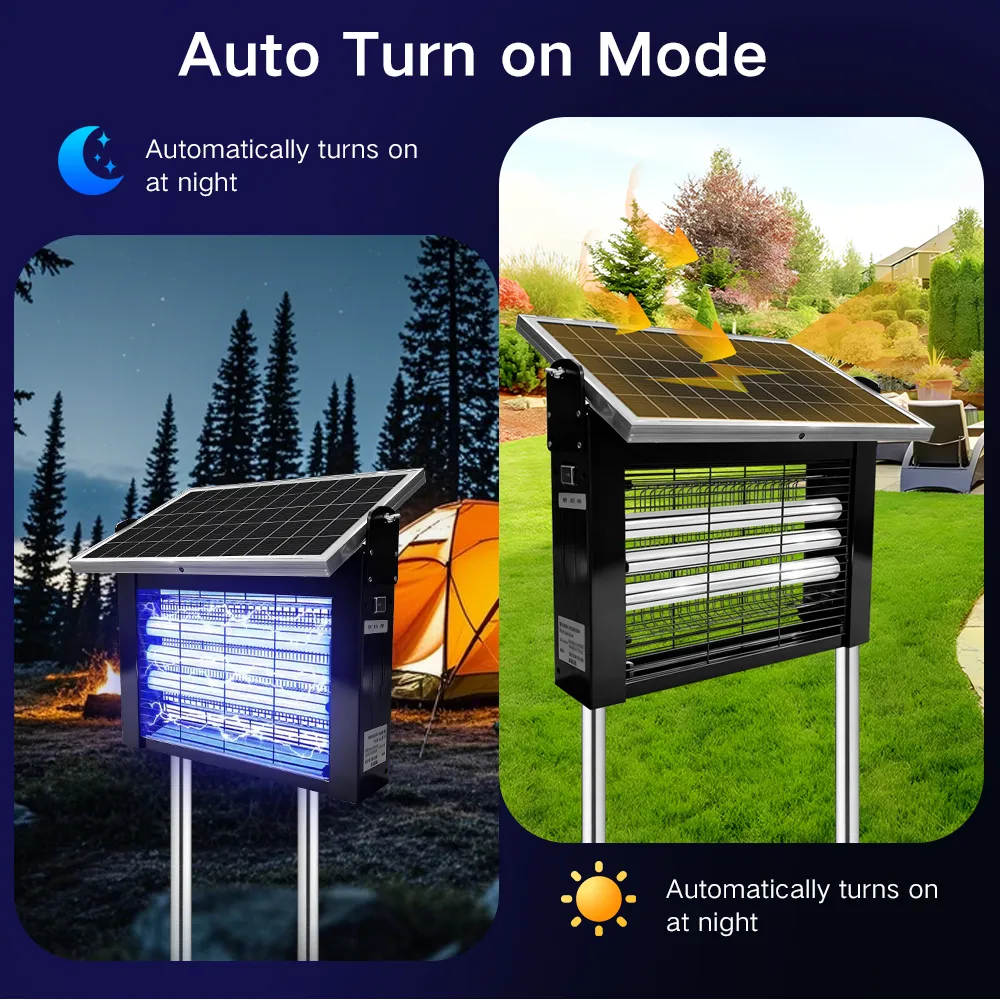
Throughout 2023 and most of 2024, solar outdoor mosquito killer lamps remained a niche, secondary product category. On Amazon, these items were mostly categorized as patio decor with basic mosquito-killing functionality. Each individual ASIN only generated 8,000–15,000 units in annual sales, failing to gain traction as mainstream outdoor and garden merchandise.
Solar Outdoor Mosquito Killer Lamps Wholesale Buyer Guide

Most importers treat an OEM mosquito swatter order as a single transaction: send a sketch, get a sample, place a PO. In practice, every project that ships late in the first 18 months of a brand breaks down for the same five reasons — undefined artwork handoff, tool-making left until after PO confirmation, certification testing ordered in parallel with sampling, and packaging dielines frozen too late.
OEM Swatter Manufacturing Project Management
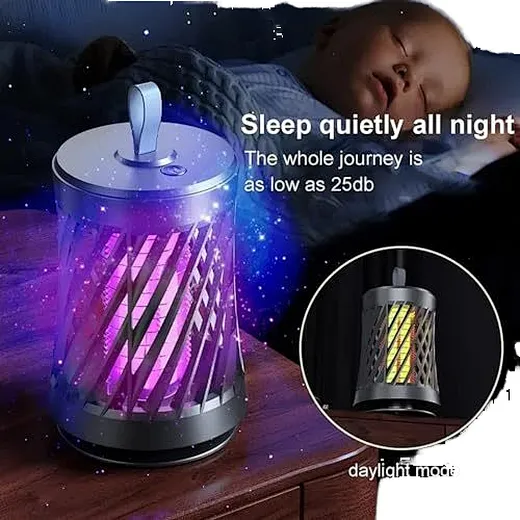
The charging port is no longer a minor accessory detail for mosquito swatters and UV mosquito killer lamps in 2026. It has become a core indicator that determines product price tiers, EU market eligibility, after-sales failure rates, and global buyer preference. For exporters, distributors, and retail buyers, choosing between Type-C and Micro-USB directly impacts profitability, compliance risks, and market competitiveness.
Type-C vs Micro-USB on Mosquito Swatters and Killer Lamps

Mosquitoes are more than just annoying summer pests—they carry harmful pathogens that cause Zika, dengue, West Nile virus, and other serious illnesses. While store-bought sprays, repellents, and DIY traps offer temporary relief, they fail to address mosquito infestations at the source.
What Do Pest Control Companies Use for Mosquitoes