
What to Do When Your Electric Mosquito Swatter Light Flickers
2025-09-09
What to Do When Your Electric Mosquito Swatter Light Flickers? 3-Step Troubleshooting + Solutions
As summer arrives, electric mosquito swatters become a "mosquito-killing essential" in many households. However, minor malfunctions are inevitable during use, and flickering lights are one of the most common issues. A flickering light not only impairs nighttime mosquito-killing performance but may also indicate potential safety hazards in the device. This article will break down the causes, solutions, and daily maintenance tips for a flickering electric mosquito swatter light, helping you quickly restore your device to normal use.

I. First, Understand the Common Causes of Flickering Lights in Electric Mosquito Swatters
Before attempting repairs, it is crucial to identify the root cause of the flickering. Different causes require different solutions, and blind disassembly may further damage the device. Below are the three most common triggers, listed from simple to complex for systematic troubleshooting:
1.1 Basic Issue: Insufficient Battery Power or Poor Contact
This is the most easily overlooked yet simplest issue to resolve. The lights (especially LED indicator lights) of electric mosquito swatters are highly sensitive to power fluctuations:
- If the battery power is too low, the power supply becomes unstable, causing the light to flicker "on and off";
- Oxidation or looseness of the contact plates between the battery and the swatter, or incorrect battery installation, can also interrupt current transmission and lead to flickering lights.
1.2 Core Malfunction: Loose or Broken Wires/Solder Joints
Electric mosquito swatters are prone to bumps, drops, and long-term vibration during use, which may damage internal wires:
- The wires connecting the LED bulb to the circuit board may break or fall off;
- Solder joints on the circuit board may oxidize or become loose (e.g., poor contact caused by heat or moisture after long-term use);
- Wear on the internal contact plates of the switch component can cause unstable current flow, indirectly leading to flickering lights.
1.3 Hardware Damage: Faulty Bulb or Circuit Board
If the above two causes are ruled out, the issue may stem from core hardware damage—a more serious malfunction:
- The LED bulb itself may age or burn out (e.g., due to long-term high-load use or bulb breakdown caused by voltage fluctuations);
- Damage to components such as capacitors or resistors on the circuit board can disrupt the power supply circuit and affect the normal operation of the light.

II. Targeted Solutions: 4 Ways to Fix a Flickering Electric Mosquito Swatter Light
Based on the causes above, you can follow the principle of "starting with simple fixes before complex ones" to attempt repairs step by step. Note: Before repairing, ensure the electric mosquito swatter is disconnected from power (unplug the charging cable and remove the battery) to avoid electric shock.
2.1 Method 1: Check the Battery to Resolve "Unstable Power Supply"
This is the first step and the lowest-cost solution:
- Check Power Level: If the swatter has a power indicator, observe whether it shows low power. If not, charge it for 3-4 hours (follow the instructions to avoid overcharging), then turn it on to test if the light still flickers;
- Inspect Battery Contacts: Remove the battery, wipe the positive/negative terminals of the battery and the internal contact plates of the swatter with a cotton swab dipped in alcohol (to remove oxidation), then reinsert the battery, ensuring it is properly installed and secure;
- Replace the Battery (for Removable Batteries): If the light still flickers after charging, or if the battery has been used for more than 2 years (lithium batteries typically have a lifespan of 2-3 years), try replacing it with a battery of the same model (e.g., 18650 lithium battery, AA battery, etc., ensuring voltage and size match), then test again.
2.2 Method 2: Disassemble and Inspect Wires to Fix "Poor Contact"
If the battery is working properly, disassemble the swatter to check internal wires (suitable for users with basic hands-on skills):
- Disassemble the Housing: Use a screwdriver to remove the screws from the swatter’s housing (keep the screws in a safe place to avoid loss), then gently open the housing. Be careful not to pull the internal wires;
- Check Wires and Solder Joints: Inspect whether the wires connecting the bulb are broken, and whether the solder joints on the circuit board are blackened or detached (loose soldering). If a wire is broken, strip the insulation from the broken end and solder it back in place with a soldering iron. If a solder joint is loose, reinforce it with additional soldering;
- Examine the Switch: Press the switch and check if the internal contact plates are deformed or worn. If the plates are loose, gently bend them back to restore contact. If wear is severe, replace the switch with one of the same model.
2.3 Method 3: Replace the Bulb to Fix "Faulty Bulb"
If the bulb is confirmed to be faulty (e.g., the light does not turn on at all, or flickers with "strobing"):
- Identify the Bulb Model: Check the markings on the bulb (e.g., "3V 20mA") or measure its size (common types include 5mm and 3mm through-hole LED bulbs), then purchase a bulb of the same model;
- Replace the Bulb: Use a soldering iron to heat the solder joints of the old bulb and remove it. Align the positive/negative terminals of the new bulb with the corresponding solder joints on the circuit board (note the polarity—there is usually a "+" or "-" mark on the board), then solder it in place. Avoid excessive heat during soldering to prevent burning the bulb;
- Test: After soldering, do not reassemble the housing immediately. Connect the battery to test if the light works normally without flickering, then reattach the housing.
2.4 Method 4: Professional Repair or Replacement for "Circuit Board Faults"
If troubleshooting reveals damaged circuit board components (e.g., swollen capacitors, burnt resistors) or if you lack repair experience:
- Contact Brand After-Sales Service: If the swatter is still under warranty (usually 1 year), contact the brand’s customer service to send it back for repair or replacement;
- Abandon Repair and Replace the Swatter: If the swatter has been used for more than 3 years, or if repair costs are high (e.g., circuit board replacement costs are close to the price of a new swatter), it is recommended to replace it directly to avoid frequent malfunctions after repair.

III. Prevention First: Extend the Life of Your Electric Mosquito Swatter and Reduce Light Flickering
Rather than repairing faults after they occur, daily maintenance can reduce problems and extend the device’s lifespan. Here are three tips to help you maintain your electric mosquito swatter:
3.1 Charge Correctly to Protect the Battery
- Follow the instructions for charging time to avoid overcharging (e.g., if the manual recommends 4 hours, do not charge it overnight)—overcharging accelerates lithium battery aging;
- Charge the battery before it is completely drained to avoid deep discharge (long-term deep discharge reduces battery capacity);
- When not in use for a long time (e.g., in winter), fully charge the battery before storage and recharge it every 3 months to prevent damage from low power.
3.2 Avoid Bumps and Moisture to Protect Internal Components
- Prevent the swatter from being dropped or hit during use to avoid broken internal wires or loose solder joints;
- Do not operate the swatter with wet hands, and avoid prolonged use in humid environments such as bathrooms or kitchens to prevent circuit board oxidation from moisture;
- When cleaning the swatter, disconnect it from power first, wipe the grid and housing with a dry cloth, and do not rinse the interior with water.
3.3 Use Properly to Reduce Hardware Wear
- Do not use the swatter to hit metal objects or water (to avoid short circuits that damage the circuit board);
- Avoid leaving the light on for extended periods at night (only turn it on when killing mosquitoes) to reduce bulb wear;
- If the grid is deformed or damaged, repair or replace it promptly to avoid affecting circuit stability.
Conclusion
A flickering light in an electric mosquito swatter is not a "terminal illness." In most cases, it is caused by minor issues such as poor battery contact or loose wires, which can be resolved with simple troubleshooting and repairs. However, if the problem involves a faulty circuit board and you lack repair experience, do not disassemble the device forcibly to avoid safety risks. With proper daily charging, cleaning, and protection against bumps, you can significantly reduce malfunctions and ensure your electric mosquito swatter accompanies you through a comfortable summer.
Do Mosquitoes Prefer Light or Dark Skin
What is the difference between purple light and blue light in mosquito killers
Related Article
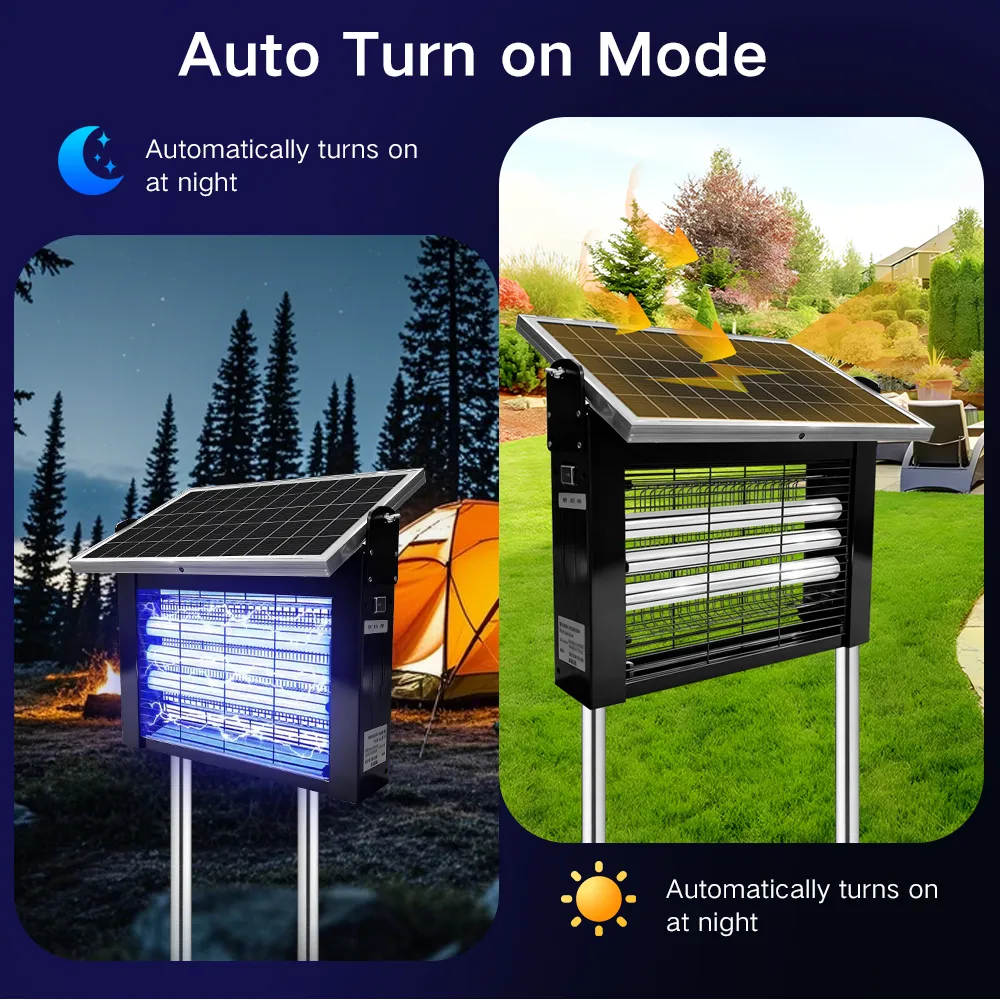
Throughout 2023 and most of 2024, solar outdoor mosquito killer lamps remained a niche, secondary product category. On Amazon, these items were mostly categorized as patio decor with basic mosquito-killing functionality. Each individual ASIN only generated 8,000–15,000 units in annual sales, failing to gain traction as mainstream outdoor and garden merchandise.
Solar Outdoor Mosquito Killer Lamps Wholesale Buyer Guide

Most importers treat an OEM mosquito swatter order as a single transaction: send a sketch, get a sample, place a PO. In practice, every project that ships late in the first 18 months of a brand breaks down for the same five reasons — undefined artwork handoff, tool-making left until after PO confirmation, certification testing ordered in parallel with sampling, and packaging dielines frozen too late.
OEM Swatter Manufacturing Project Management
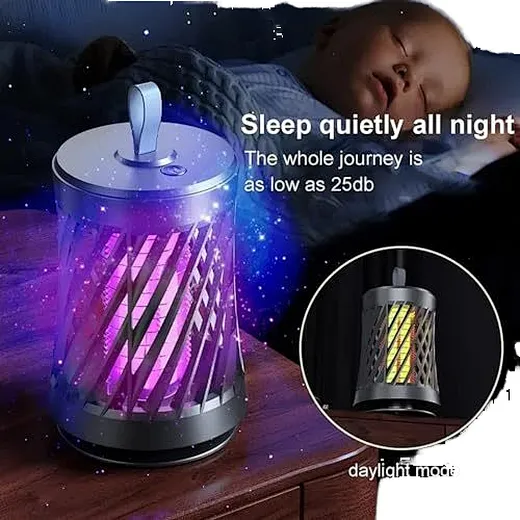
The charging port is no longer a minor accessory detail for mosquito swatters and UV mosquito killer lamps in 2026. It has become a core indicator that determines product price tiers, EU market eligibility, after-sales failure rates, and global buyer preference. For exporters, distributors, and retail buyers, choosing between Type-C and Micro-USB directly impacts profitability, compliance risks, and market competitiveness.
Type-C vs Micro-USB on Mosquito Swatters and Killer Lamps

Mosquitoes are more than just annoying summer pests—they carry harmful pathogens that cause Zika, dengue, West Nile virus, and other serious illnesses. While store-bought sprays, repellents, and DIY traps offer temporary relief, they fail to address mosquito infestations at the source.
What Do Pest Control Companies Use for Mosquitoes